Do you know how to wipe your MacBook clean? If you want to replace or repurpose your computer, it’s essential that you protect your sensitive information by securely wiping your hard drive.
This guide will compare the options of formatting and wiping your hard drive, and cover what you should do before getting started. Then we’ll show you 5 easy steps to securely and completely wipe your MacBook clean – for computers both with and without the Apple T2 security chip.
Formatting or Data Wiping – What’s the Difference?
To gain a better understanding of your options for erasing all the information from your Mac, we will first compare formatting to data wiping.
- Formatting your MacBook with macOS native functions
Macs come with a feature called ‘Disk Utility’, which is a built-in tool that allows you to format your hard drive. Formatting is an alternative method that some users choose when trying to remove the data from their MacBook. However, this option is not effective if you want to permanently erase all the data from your computer.
Pros: The ‘Disk Utility’ tool is a native function of Mac computers, which means it’s free.
Cons: This solution will not permanently remove all your sensitive information, and data will still exist on your MacBook that can be recovered by using file recovery software. - Wiping your MacBook clean with data wiping software
Data wiping is the process of using software to permanently erase the contents of your computer’s disk space. If you want to make your sensitive information disappear for good, then this is the preferred option.
Pros: Wiping your data gives you peace of mind by permanently removing the entire contents of your disk space, including the Data Remanence.
Cons: Reliable data wiping is likely a paid solution.
Before You Wipe Your MacBook…
… You should back up your data! Creating a backup is the process of saving the data you want to keep in a separate location. Data can be backed up by using Apple’s Time Machine, while you can also store information in your iCloud or iCloud Drive. Alternatively, you can copy data to an encrypted removable device or transfer data directly to another computer.
After you have backed up your data, it would be wise to ensure your vulnerable information is being kept safe by using encryption software. Check these 3 tips on how to choose the right encryption solution for you.
In addition to creating a backup, Apple recommends that you turn off certain features and services before erasing data from your MacBook.
How to Wipe Your MacBook Clean with BCWipe Total WipeOut
It’s now time to securely wipe your MacBook clean. Here we’ll use BCWipe Total WipeOut. Before starting, make sure to select the right set of instructions for your use case.
Mac computers can be divided into 2 categories:
- Without the Apple T2 Security Chip
This category includes all Macs released before December 2017.
Go to step-by-step instructions
- With the Apple T2 Security Chip
Apple introduced the T2 security chip in late 2017. Since then, all new Apple computers
feature this chip.
Go to step-by-step instructions
Both instructions allow you to also wipe a hard drive on a dead computer.
Not sure which type of computer you have? Find more information on Mac models with the Apple T2 Security chip.
How to Wipe Your MacBook Clean Without the Apple T2 Security Chip
Step 1: Getting Started
If you haven’t done so already, get started by installing BCWipe Total WipeOut. Not ready to commit to buying the software yet? No problem, you can get started with your free trial now.
IMPORTANT: You need a Windows computer to create a bootable USB drive with BCWipe.
- Go to the Start menu
- Select ‘BCWipe Total WipeOut’
- Open ‘BCWipe Total WipeOut Configuration Wizard’
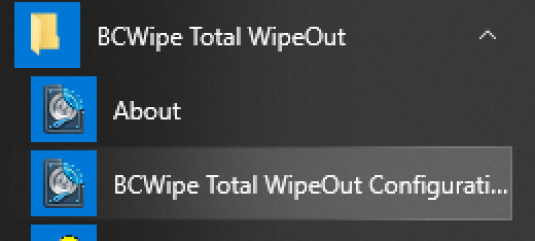
When asked for elevation, click ‘OK’
Step 2: Transfer BCWipe to a USB Drive
As you will be wiping the operating system from your MacBook, you need to put BCWipe Total WipeOut on to a USB drive to move forwards.
- Select ‘Bootable USB drive’
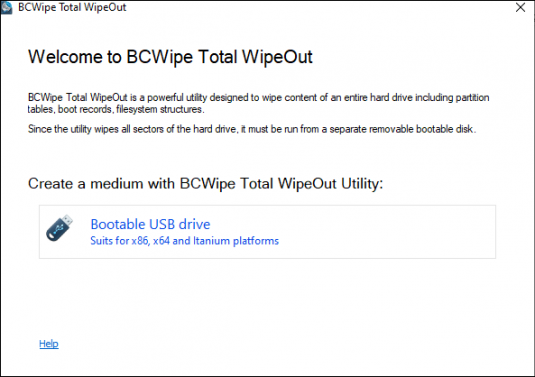
- Connect USB drive to your computer
- Click ‘Next’
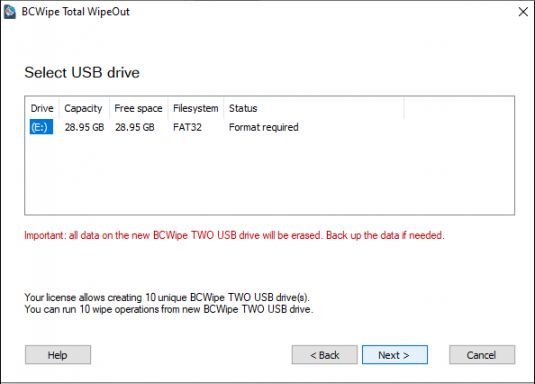
Step 3: Choose Automatic Mode
Now you can use the default settings to wipe your MacBook.
Now, you can either proceed with the automatic or manual wiping mode. If you select automatic mode, all of your drives will be automatically wiped after booting the computer. If you choose manual mode, you can choose which drives you want to wipe and which wiping options you want to use at boot time.
If you would prefer to create a wiping USB in manual mode, please see our instructional video.
- Select ‘Automatic mode’
- Click ‘Next’
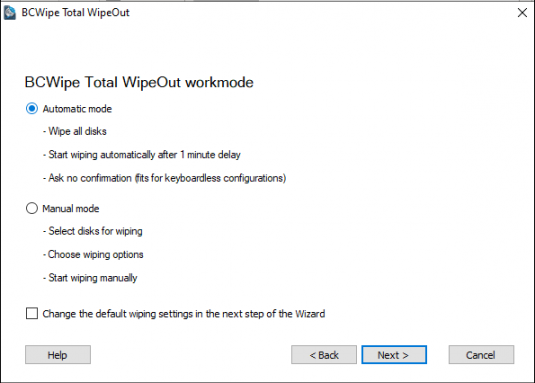
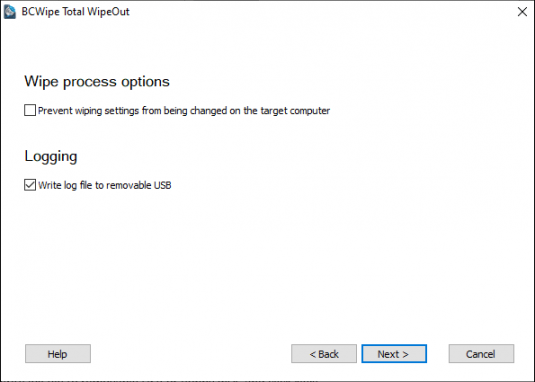
Step 4: Create Log File
At this stage, you can create log files if you wish. Logging is useful if you want to keep a record of what has been deleted.
- Select ‘Write log file to removable USB’
- Click ‘Next’
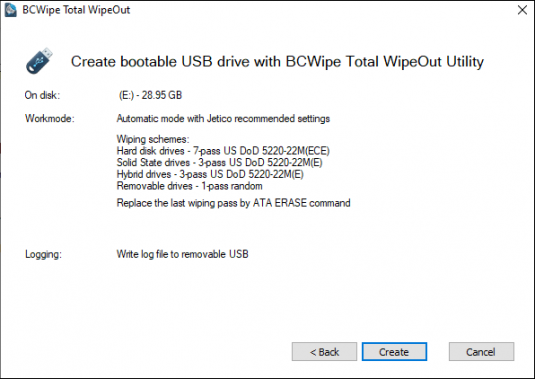
- Check the summary
- Click ‘Create’
- Once the process is done, click ‘Finish’
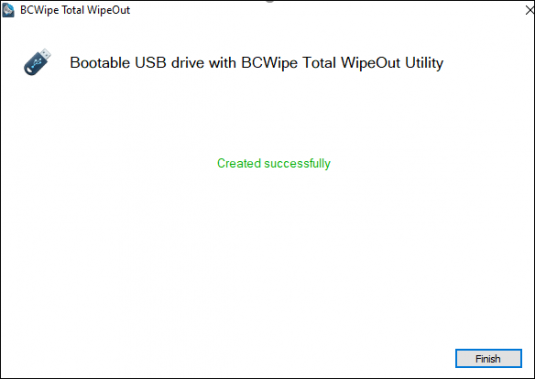
Step 5: Wipe Your MacBook
Your USB drive is now ready for wiping. Connect the USB to the computer you wish to erase and then boot your Mac.
How to Wipe Your MacBook Clean With the Apple T2 Security Chip
Step 1: Getting Started
If you haven’t previously done so, get started by downloading and running BCWipeTWO.dmg. Not ready to buy yet? No problem, you can get started with your free trial now.
- Download and run ‘BCWipeTWO.dmg’
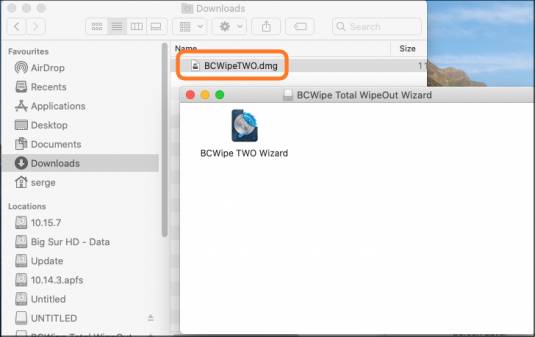
Step 2: Transfer BCWipe to a USB Drive
Since you will wipe the operating system from your computer, you need to put the software on to a USB drive in order to carry out the operation.
- Run ‘BCWipe Total WipeOut Wizard’
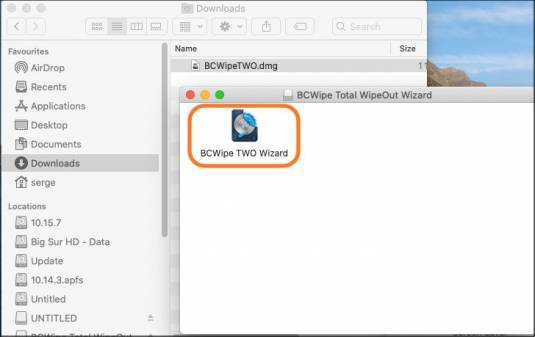
- Connect the USB drive to your computer
- Click ‘Continue’
- Register the software with your license, or use it in ‘Demo’ mode
- Click ‘Continue’
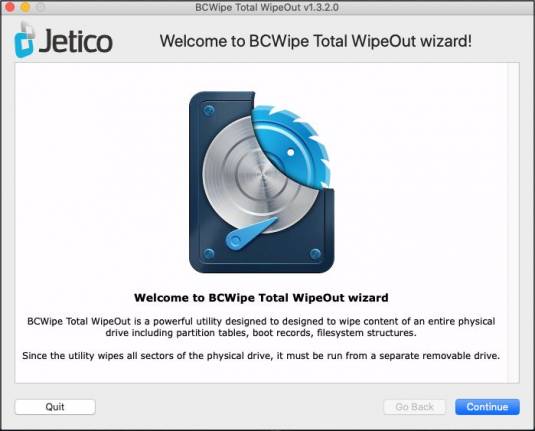
Step 3: Select Wiping Mode
Now, you can either proceed with the automatic or manual wiping mode. If you select automatic mode, all of your drives will be automatically wiped after booting the computer. If you choose manual mode, you can choose which drives you want to wipe and which wiping options you want to use at boot time.
- Choose ‘Automatic mode’ or ‘Manual mode’
- Choose the default wiping scheme
- Click ‘Continue’
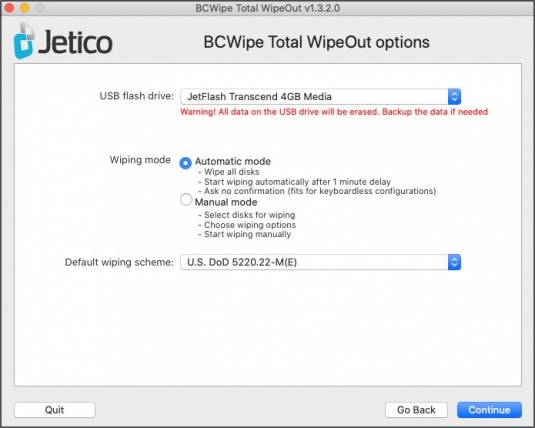
Step 4: Create the USB
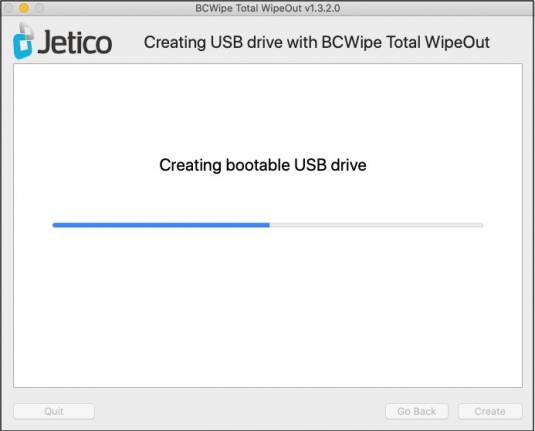
- Click ‘Create’
- Wait for the process to finish
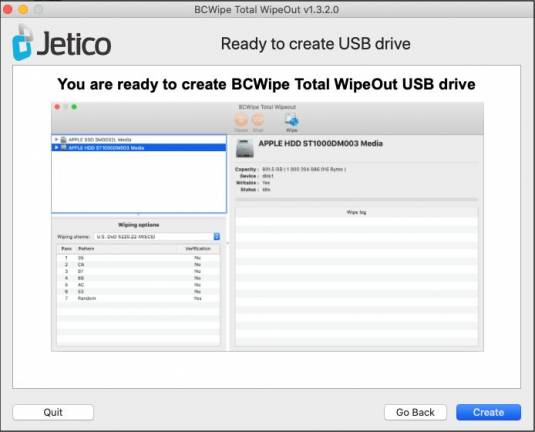
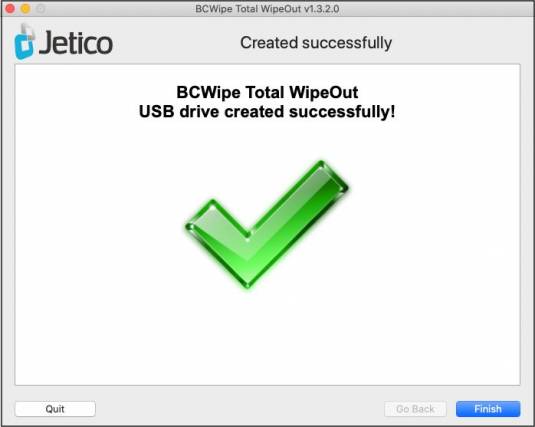
- Click ‘Finish’
Step 5: Wipe Your Mac Computer
The USB drive is now ready to use for wiping. You can proceed by booting the system you want to erase with the USB.
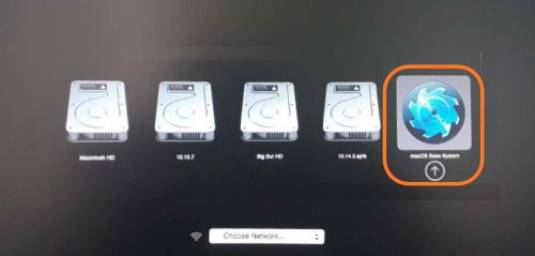
- Boot the computer with the USB inserted and keep pressing ‘Alt’ during the boot process
- Select ‘macOS Base System’
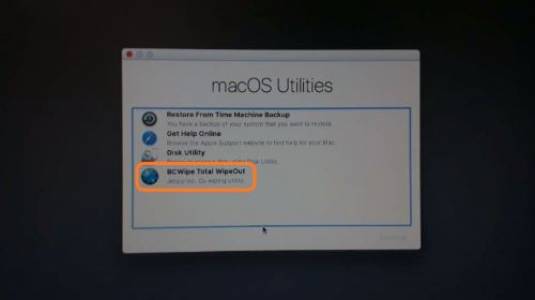
- Choose ‘BCWipe Total WipeOut’
If you chose ‘Automatic mode’, the wiping process will start automatically and you won’t need to do anything.
If you chose ‘Manual mode’, you should select the drive that needs to be wiped and then press the ‘Wipe’ button. You can also change the wiping scheme as you see fit. Information about the selected drive will be displayed on the right.
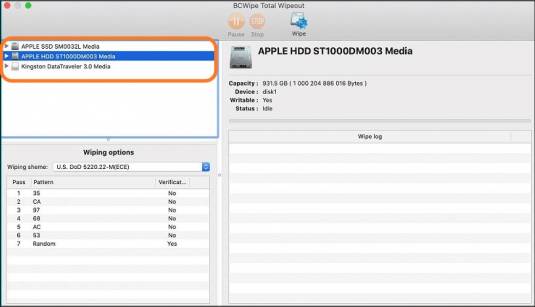
- Wait for the process to complete
- During the process, you can read the records in the log file
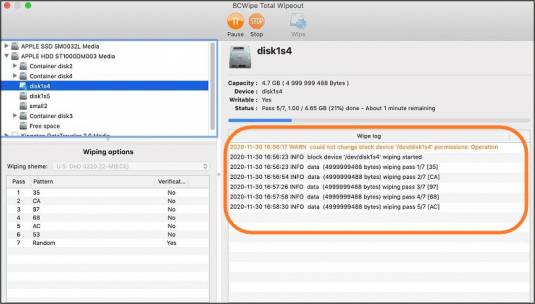
Reinstall Your macOS after Wiping
By following either set of step-by-step instructions, BCWipe Total WipeOut will permanently remove all the information from your drive, including the macOS, file system, information about partitions, and hidden disk areas.
If you want to use your MacBook again, you will first need to reinstall your operating system. Here are Apple’s instructions on how to reinstall your macOS.
Congratulations, you have now securely wiped your MacBook clean!
To learn more about keeping your computer clean, such as wiping files on active systems, check our ultimate guide.
Happy Wiping!
Related Articles
Data Sanitization 5 Common Myths
Hardware Decommissioning Process: A 5-Step Checklist
The Ultimate Guide to Deleting Files Permanently
IRS Publication 4812 & How to Comply with Wiping Standards
DoD 5220.22-M Explained – Data Erasure Standards
NIST SP 800-88 Guidelines for Media Sanitization Explained
How to Wipe an NVMe Drive
How to Wipe an SSD on Windows 11 & 10
How to Wipe a Hard Drive on a Dead Computer
