
SUMMARY: Data remanence refers to the hidden traces of deleted files that stay on your system long after you think they are gone. These leftovers create privacy risks and may threaten compliance if sensitive information is recovered. This guide shows where residual data hides, such as free space, file slack and system logs, and how BCWipe permanently removes it. You will also learn five practical steps to wipe data remanence and keep confidential information protected.
What is Data Remanence? If you haven’t been using a data wiping solution to permanently erase your private information, you are likely to have residual data, or Data Remanence, on your computer.
Here, we’ll help you learn about Data Remanence and its risks, as well as how to permanently remove traces of unwanted data from your system in 5 easy steps.

What Is Data Remanence?
Data Remanence, one of the most common cybersecurity myths, is the residual data that remains after you perform common activities like moving files or ‘deleting’ by normal means. In these instances, only references to the files are removed, while the file data and related information will remain intact on your system in various places:
- Free space and file slack space
- File names stored in the Master File Table (MFT) and directories
- Temporary data stored in the system, such as TMP files, swap files, shadow copies, system log files and Internet cache
In order to understand Data Remanence, it’s helpful to think of your operating system as a messy baby. When you’re feeding a baby, there’s obviously a tendency for food to end up in all sorts of places other than the baby’s mouth. Well, that’s similar to how operating systems handle your sensitive data – the data gets splattered all around in many locations you had not intended or realized. While messy babies are harmless and adorable, a messy operating system carries serious risks to your security and privacy.

What Is the Risk of Data Remanence?
When operating systems handle your sensitive information and Data Remanence ends up in hidden or unknown places, third parties can easily recover your original data by using widely available file recovery software.
Especially for businesses, unwanted files can lead to harmful situations:
- Data breaches
- Violation of compliance regulations
- Reputation damage
Remove Data Remanence with Data Wiping Software
Users have grown more aware that ‘deleting’ files does not mean obliterating the information they contain.
Matthew Geiger, Carnegie Mellon University, Forensic Sciences
In order to permanently erase your sensitive information and ensure that no traces of unwanted data remain, it’s clear that your operating system needs some extra help in securely deleting your files. This help can be provided by data wiping software, which is used to shred the contents of your sensitive files or disk space beyond recovery. Using data wiping software regularly will eliminate the problems posed by Data Remanence and truly protect your sensitive information from third parties.
How to Wipe Data Remanence in 5 Steps with BCWipe
Using BCWipe is like having your own magic nanny to clean up your mess of Data Remanence. By clearing your files and Data Remanence beyond forensic recovery, BCWipe will give you peace of mind that your sensitive information has disappeared for good.
Here’s how you can remove Data Remanence with BCWipe in 5 easy steps.
First, make sure you have BCWipe installed. For help with installation, see our instructional video. If you aren’t ready to commit, the software is available as a free trial.
Step 1: Wipe Free Space
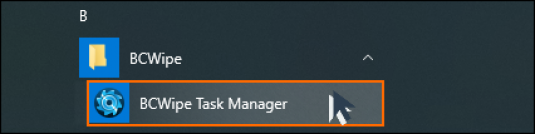
- Launch BCWipe Task Manager from ‘Start’ –> ‘BCWipe’
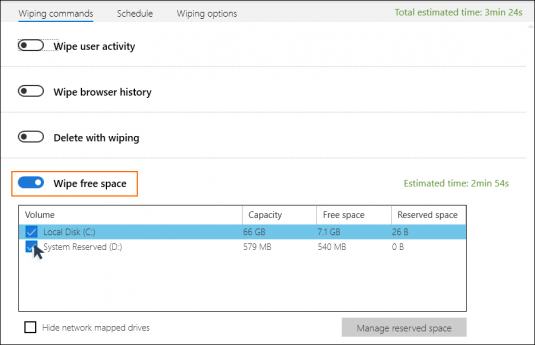
- Click ‘Add task’ at the lower toolbar.

- Enable ‘Wipe free space’ and select drives.
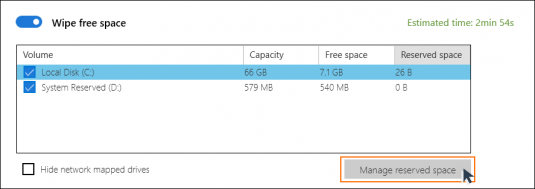
OPTIONAL: Wiping free space can be a time-consuming task. To perform this task in less time, enable ‘Manage Reserved Space’. This feature will block off a portion of free space after it has been wiped, which then reduces the amount of free space to be wiped in the future.
- Select a drive and click ‘Manage Reserved Space’
- The slider will jump to the recommended value. Drag to adjust if needed.
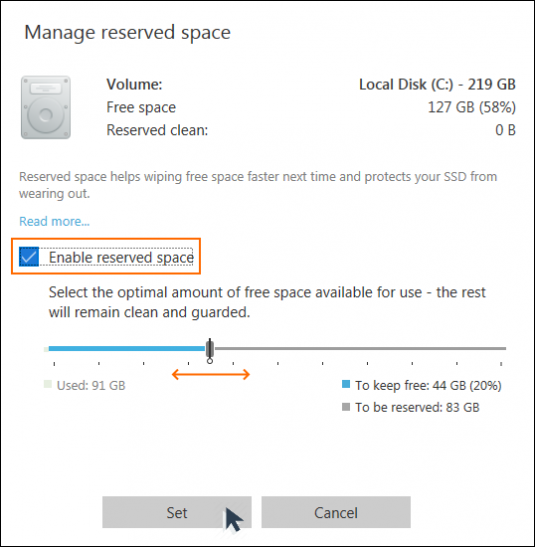
- Click ‘Set’
Step 2: Wipe File Slack Space
- Switch to the ‘Wiping options’ tab and enable ‘File slacks’ and ‘Directory Slacks’
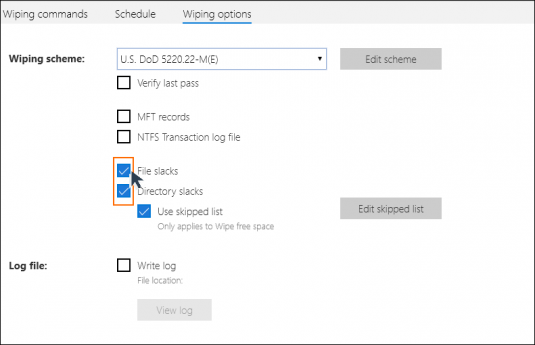
‘File slacks’ may contain data from other previously deleted files, while ‘Directory slacks’ might also contain names of previously deleted files and other deleted data.
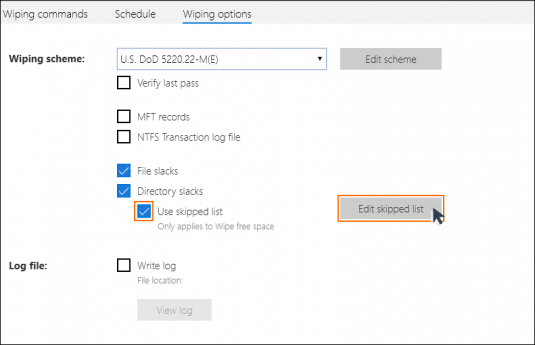
OPTIONAL: Wiping file and directory slacks is sometimes a time-consuming task, especially when there are many files and folders on the drive. For certain files and folders that you plan to keep for a long time, you can just wipe their slacks once and then configure BCWipe to skip these directories. To create a list of skipped files and folders, check ‘Use skipped list’ and click ‘Edit’.
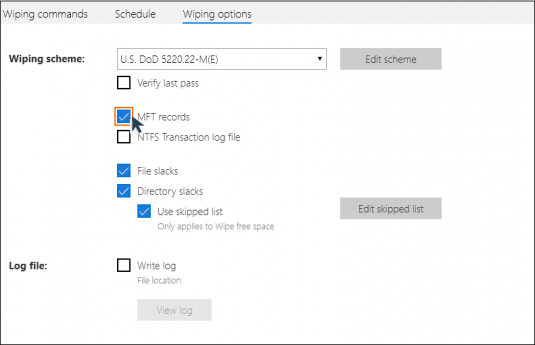
Step 3: Wipe MFT Records & Directory Entries
- Enable ‘MFT records’
‘Master File Table’ (MFT) is a reserved space on NTFS drives where the file system stores the names and attributes of files. Small files may also be stored inside the MFT. Setting this option helps securely overwriting the names and attributes of the files you are erasing.
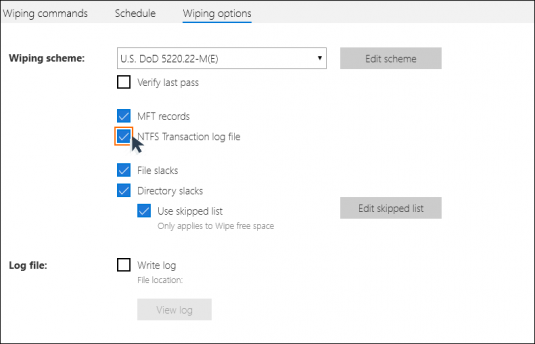
Step 4: Wipe Temporary Data Stored in NTFS Log File
- Enable ‘NTFS Transaction Log File‘
NTFS is a journaling file system and uses the ‘NTFS Log’ ($LogFile) to record and store temporary data for all files you are working with. Setting this option helps eliminating traces of deleted files.
Step 5: Review & Run
- If you are using SSD, make sure that the Wiping scheme selected is ‘U.S. DoD 5220.22-M(E)‘. This will ensure secure deletion.
- Set ‘Write log’ to enable logging. Once you enable this option, the path to the log file will appear underneath.
- Switch to the ‘Schedule’ tab to confirm when the task will run. By default, the task starts immediately.
You are all set. Review the settings one last time. Remember, after wiping all selected data will be unrecoverable, even with forensic tools.
Ready? Click ‘Save and start’ or ‘Save’ (in case you changed the default schedule) to initiate the process.

Transparent Wiping – Set It & Forget for Data Remanence
When Transparent Wiping is activated on your computer, BCWipe will automatically erase all contents – including Data Remanence – of any deleted files or temporary files beyond forensic recovery.
Watch our how-to video to enable Transparent Wiping on your computer now.
Happy Wiping!
Frequently Asked Questions (FAQs)
Data remanence refers to the leftover traces of files that remain on your system even after normal deletion. These fragments can stay in free space, file slack, MFT records and temporary system files. Because they can be recovered with common forensic or recovery tools data remanence creates serious privacy and compliance risks.
When you delete a file your operating system removes the reference to it but not the underlying data. The information stays on the drive until it is overwritten which means attackers or auditors can still restore it. This is why emptying the Recycle Bin isn’t considered secure.
To eliminate residual data you need to overwrite these hidden areas with dedicated wiping software. Tools such as BCWipe securely replace leftover information with random patterns so it can’t be recovered. Regular wiping lowers the risk of exposing sensitive information.
BCWipe is designed to wipe selected files, free space, file slack, MFT records and temporary data on active systems. For full drive sanitization especially on devices you plan to retire BCWipe Total WipeOut overwrites the entire disk beyond forensic recovery. Both tools support compliance requirements for secure erasure.
Transparent wiping is a background feature in BCWipe that automatically wipes deleted or temporary files as soon as they appear. It is ideal for users who work with sensitive information and want ongoing protection without running manual tasks. This set it and forget it option helps keep your system clean and low risk at all times.