
USB external erasers are a type of technology designed to securely and permanently erase data from computers or external storage media.
In this blog, you can learn everything you need to know about USB external erasers, including step-by-step instructions on how to use a USB external eraser to wipe a drive with BCWipe Total WipeOut.
What Is a USB External Eraser?
A USB external eraser is a software tool used to securely erase data from storage devices. Trusted solutions, such as BCWipe Total WipeOut, use advanced erasure algorithms to overwrite data multiple times, ensuring that it’s unrecoverable even with the assistance of leading forensic tools.
How Do They Work?
A USB external eraser works by turning an ordinary USB drive into a data wiping solution. After installing the software, you can connect the USB drive to any computer. The eraser then securely deletes all data on the connected storage devices, ensuring that the information can’t be recovered.
Why Use a USB External Eraser?
Here’s 5 reasons why it makes sense to opt for USB external erasers:
- Using a USB external eraser allows for drives to be reused or donated, making it an environmentally friendly option and a good solution for organizations following sustainability policies.
- Having a single USB external eraser gives you the option to wipe as many drives as you like.
- USB external erasers don’t need an internet connection to work and can be used in air-gapped environments.
- They require no extra equipment or shipping. All you need is a regular USB drive, so they are instantly available and ready to use.
- USB erasers are small and easy to carry around with you between locations.
3 Key Factors to Consider When Choosing a USB External Eraser
Not all USB external erasers are built the same. When selecting the right software for your needs, it’s essential to consider these 3 key factors:
- Level of Data Security
The effectiveness of a USB external eraser is largely determined by the erasure standards it supports. Wiping schemes like the DoD 5220.22-M are among the most trusted for ensuring data is permanently deleted and unrecoverable, but not all solutions allow you to use these advanced schemes. Make sure to verify which standards are supported to ensure you’re getting the level of security you need.
To further ensure your USB external eraser is sufficiently secure, check that the software can run a sector-level verification procedure after the wiping task is completed. This ensures all data has been securely removed. - Compatibility
Consider whether the software supports the operating systems and storage devices you typically use. Trusted solutions, such as BCWipe Total WipeOut, are OS-independent and compatible with a wide range of devices, including HDD, SSD, SSHD, NVMe and Mac. - Compliance
If your business operates in a regulated industry, ensure the USB eraser complies with relevant data protection standards and regulations, such as NIST or GDPR. In addition, make sure it includes the ability to generate reports and certificates of erasure, which are essential for companies to maintain compliance and auditing records.
How to Use a USB External Eraser to Wipe a Drive
The following instructions inform you how to create a USB external eraser that can be used to wipe a computer, another USB drive or even a loose drive.
Don’t need to review the instructions now? Skip to Additional Tips & Best Practices or contact us to book a demo.
Step 1: Move Software to a USB Drive
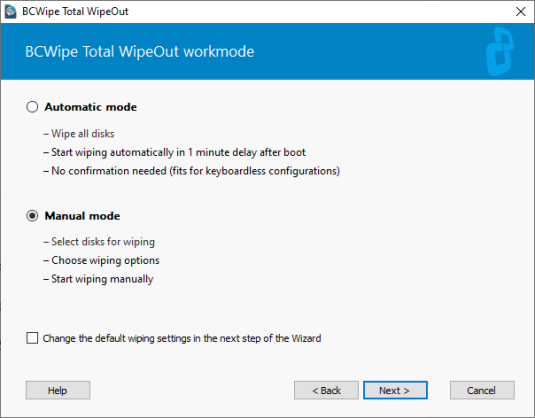
The first step involves moving BCWipe Total WipeOut to a USB drive and selecting manual mode.
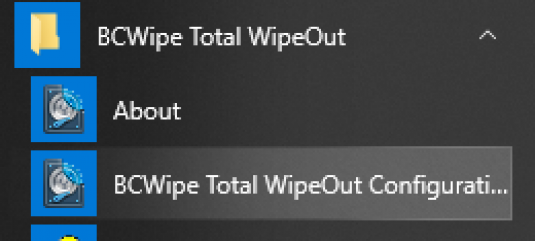
- Download BCWipe Total WipeOut
- Open ‘BCWipe Total WipeOut Configuration Wizard’
- Click ‘OK’ when asked for elevation
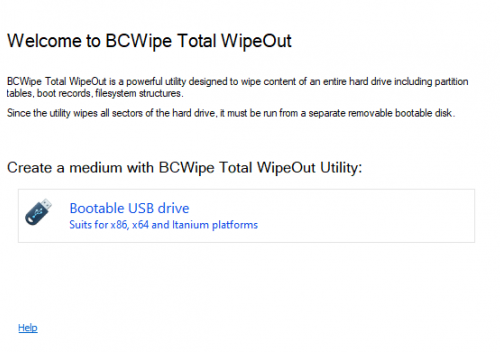
- Select ‘Bootable USB drive’
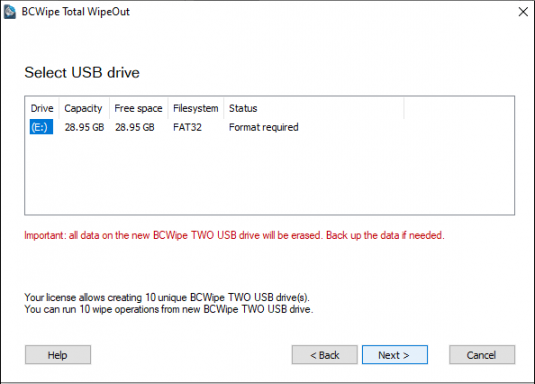
- Connect the USB drive to a computer
- Select ‘Next’
- Choose ‘Manual mode’
- Click on ‘Next’
Step 2: Configure Your System to Boot from USB Drive
Connect the bootable USB drive to the computer you wish to erase, or use a computer as a ‘station’ to wipe USB and loose drives.
- Plug the USB drive into the computer
- Open the one-time boot menu by pressing F8, F12 or Esc immediately after turning on your computer
(Notes:
– Keys for opening the one-time boot menu may vary depending on vendor. Please check your device manual for more specific instructions if needed.
– As an alternative to this step, you can also set your USB drive as a first-boot option by entering BIOS on your computer.) - Select the drive you want to erase from the list of options
- The device will now automatically start booting from your USB drive
- Access BCWipe Total WipeOut after loading is finished to confirm and start the erasing process
Step 3: Verify Erasure & Get a Certificate of Destruction [Optional]
After the process is complete, verify that the data has been erased. For auditing and compliance purposes, users of BCWipe Total WipeOut – Enterprise Edition may obtain a certificate of destruction, also known as a certificate of erasure.
Additional Tips & Best Practices
Now you know the basics about wiping a drive with your USB external eraser, here’s some additional pointers to keep in mind:
- Number of Overwrites
Consider the sensitivity of the data and the time you have. More overwrites generally lead to improved security, but the operation will take longer as a result. - Type of Drive
Different methods may be required for solid-state drives (SSDs) versus traditional hard drives (HDDs). - Regulatory Requirements
Ensure you follow any regulations that apply to data destruction in your industry.
To learn more read our data erasure standards ultimate guide.
Conclusion
By following the instructions listed above, you can securely create a USB external eraser and efficiently wipe data from both computers and USB drives, ensuring your sensitive information remains protected.
To get started with Jetico’s data wiping solutions, you can contact our Data Protection Specialists and request a free trial. To learn more about how to wipe hard drives clean, why not read our Ultimate Guide to Securely Wiping Computer Hard Drives Clean?
Happy Wiping!
Related Articles
Data Sanitization 5 Common Myths
Hardware Decommissioning Process: A 5-Step Checklist
IRS Publication 4812 & How to Comply with Wiping Standards