
SUMMARY: Encrypting files on Windows 10 does not have to be complicated. Whether you want to protect a few documents or whole folders, choosing between file level and container encryption matters. With BestCrypt Container Encryption you can create an encrypted virtual drive for your sensitive data and keep it safely out of reach.
There are two main methods to encrypt files on Windows 10.
Whether you’ll pick file or container encryption really depends on your protection needs.
As a general rule…
- File encryption lets you encrypt one file at a time.
This is the ideal solution if you need to protect just a few files, or if you need to send a sensitive file by email. - Container encryption protects many files at once.
This is the preferred choice if you need to encrypt groups of files together.
Most likely your computers are storing all sorts of sensitive data in more than a few files. So here we’ll show you how to encrypt files on Window 10 by using BestCrypt Container Encryption.
Encrypting data at rest is a fundamental control for protecting sensitive information on end-user devices.
National Institute of Standards and Technology, “Guide to Storage Encryption Technologies for End User Devices (SP 800-111)“
5 Easy Steps to Encrypt Your Files on Windows 10
If you haven’t yet installed BestCrypt, see our how-to video. The software is also available for a 21-day free trial.
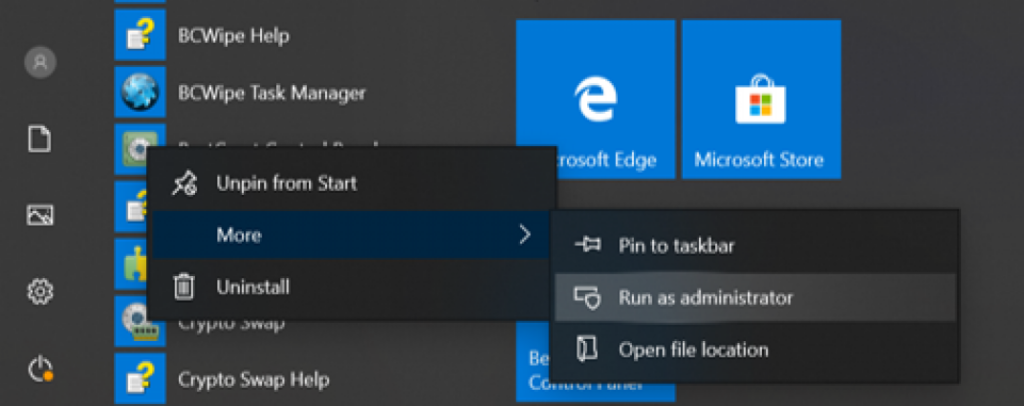
Step 1: Run the Software as Administrator
Once you have successfully installed BestCrypt, ‘Run as administrator’…
- Go to Start menu
- Select ‘BestCrypt’
- Right-click ‘BestCrypt Container Panel’
- Select ‘More’ and choose ‘Run as administrator’
- If prompted for elevation click ‘Yes’
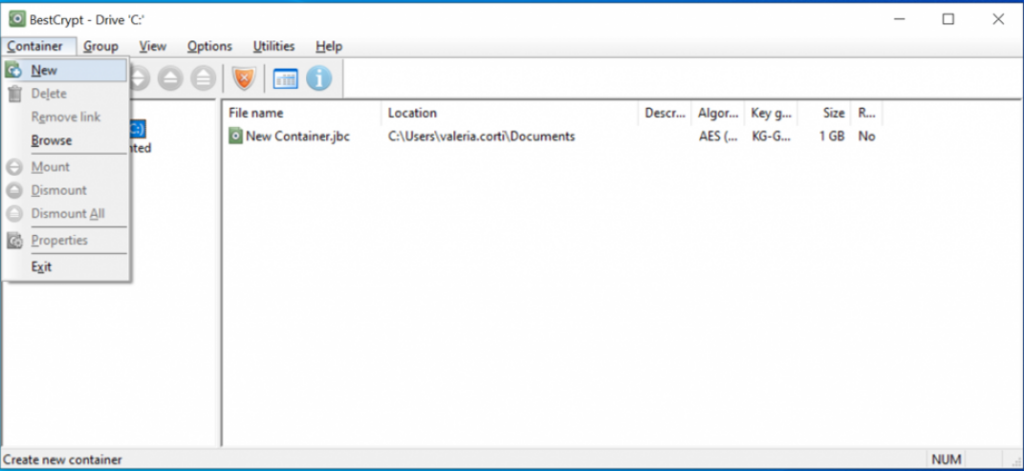
Step 2: Create Container
To create the virtual drive where you’ll store your sensitive data…
- Select ‘Container’ tab from the menu and then choose ‘New’
- Enter a container file path
Or
Select the ‘ellipsis button’ (the 3 dots) to browse for a specific location - Adjust the size of the container by using the arrows
- Enter a brief description (optional)
- Click ‘Create’
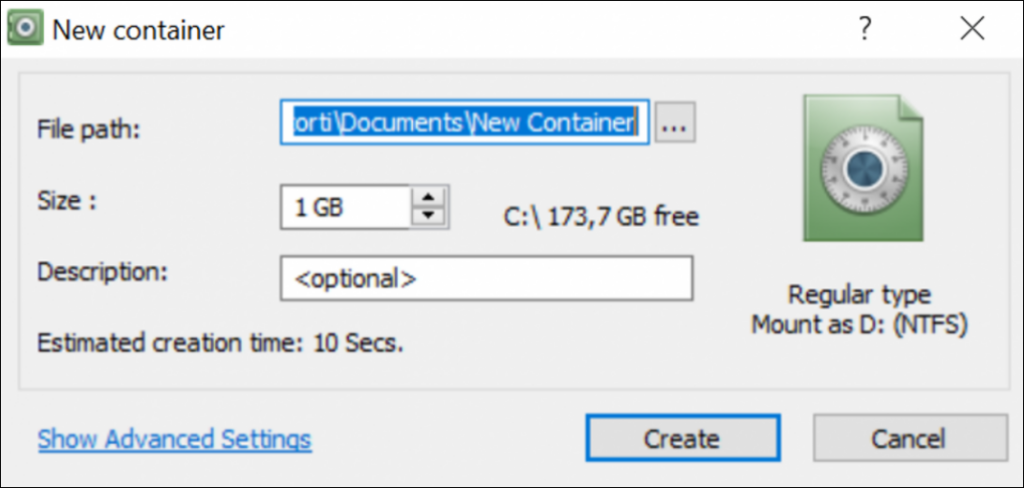
Before selecting ‘Create’, you can also change default settings or switch between encryption algorithms by clicking ‘Show Advanced Settings’. For step-by-step instructions, watch our dedicated how-to video.
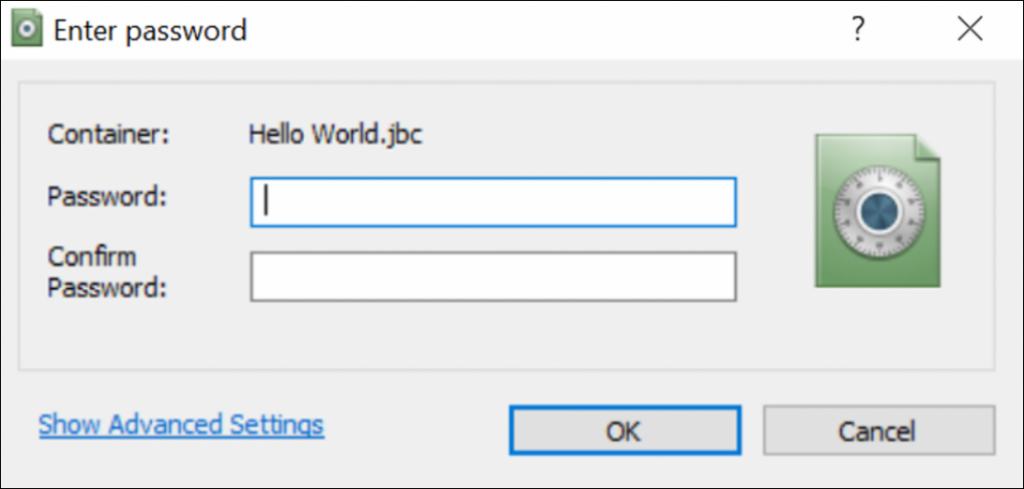
Step 3: Choose Encryption Password
It’s time to create a password for your container. Every time you access your encrypted container, this password will be requested. Be sure you don’t forget it! Here are some tips on how to create a strong and memorable password.
- Choose and enter a password (min 8 characters)
- Confirm the password
- Click ‘OK’
Step 4: Encryption Process
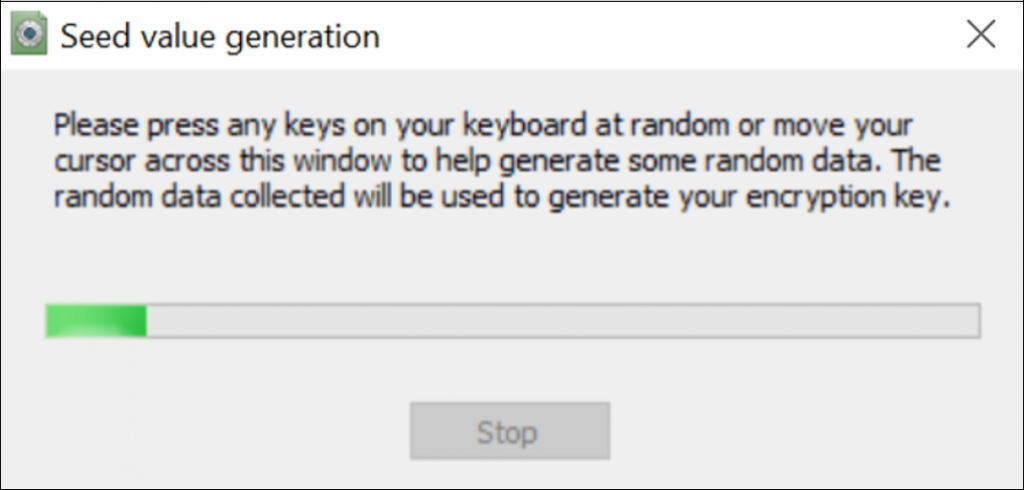
So-called ‘seed data’ is needed to generate a random encryption key. To get random data for the seed, the program will display a dialog window, visualizing the encryption seed generation process.
- Move your mouse around inside the window
OR
Type anywhere on the keyboard - Continue until the green line reaches the end of the progress bar
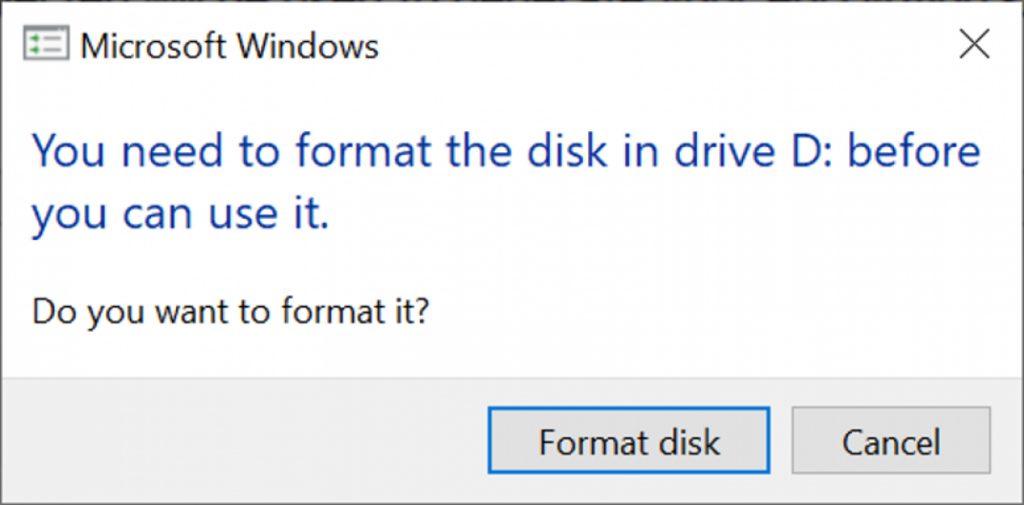
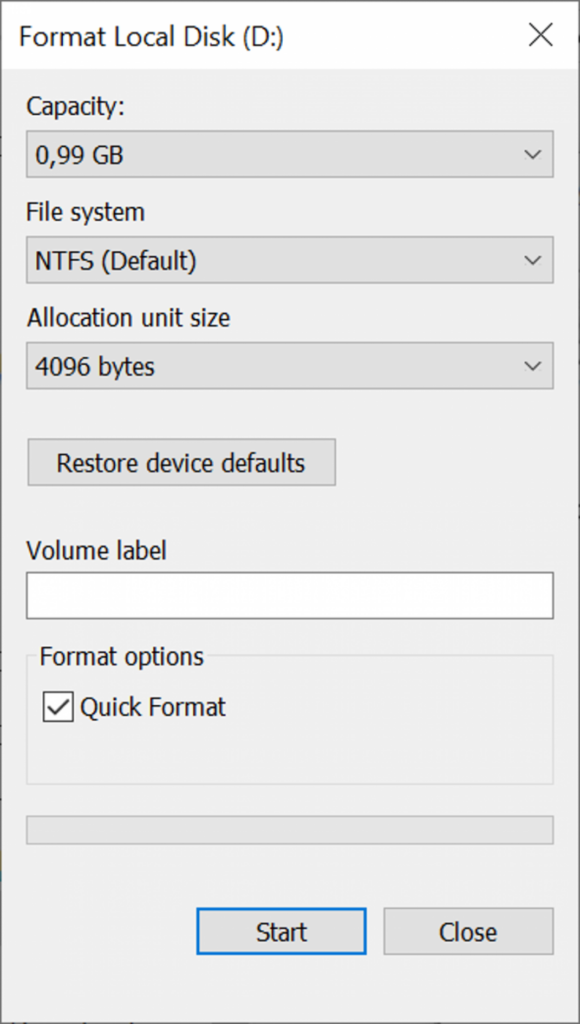
Step 5: Format Container
The container you just created will appear to Windows as another drive. To complete the process and start protecting files with BestCrypt, you will be asked to format your container. This is a standard procedure and you are not going to erase any data – your container is empty.
- Click ‘Format disk’
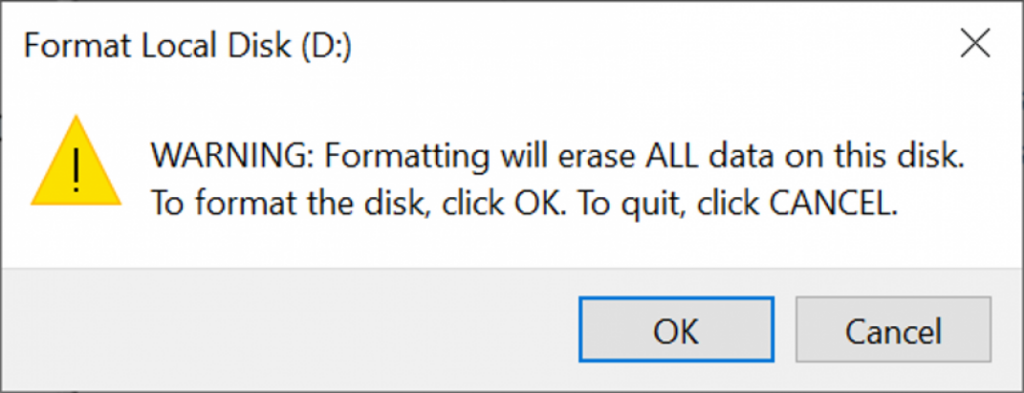
- Select ‘Start’
A warning message might pop up. This is a default message which you will receive when formatting any volume or drive, so don’t worry. Click ‘OK’ to proceed. Once formatting is complete, your encrypted container is ready to use!
Adding & Managing Files in Your Encrypted Container
Now that your container is ready, let’s add some files. You can either…
Creating New Protected Files
This is a more secure method. We recommend using it whenever you need to create a new file that needs protection. Simply right-click anywhere inside the container and select ‘New’.
Moving Existing Files Securely
You can drag and drop existing files into the container. Files created outside of the container might leave traces of information around your operating system. To solve that problem, you need to permanently delete the original unencrypted files and then wipe free space.
Residual data can remain after file deletion, which is why wiping free space is essential when migrating files into encrypted containers.
National Institute of Standards and Technology, “Guidelines for Media Sanitization (SP 800-88 Rev.1)”
Happy Encrypting!
Frequently Asked Questions (FAQs)
File encryption is ideal when you only need to protect a few individual documents or share a single sensitive file by email. Each file receives its own password, keeping risks isolated. It becomes less convenient when you need to secure many files at once.
Container encryption protects large groups of files using one password and one encrypted virtual drive. It hides filenames, folder structures and metadata, offering stronger privacy. This method works well in daily workflows where sensitive data is stored across multiple locations.
Your encrypted container cannot be opened without the correct password. Neither Jetico nor anyone else can recover it. Use a strong but memorable password or a secure password manager, because losing the password means losing access to the data.
Yes. Creating files directly inside the encrypted container leaves no unencrypted traces on the system. If you add existing files from outside, you should permanently delete the originals and wipe free space to remove any residual data.
Yes. Encrypted containers are stored as single files, so they can be moved or backed up like any other file. The contents stay protected because everything remains encrypted until the container is mounted.
Related Articles
5 Benefits of Container Encryption vs. File Encryption
How to Take Back Your Privacy in the Cloud with File Encryption Software
How to Encrypt Data on External Hard Drives (Windows 10 & Mac)