Why should you encrypt data on external hard drives? Removable drives are practical tools for businesses everywhere. Thanks to their storage capacity and small size, they are a great way to transfer or view documents from one computer to another. Yet external drives and USB sticks are also easy to lose and, if not encrypted, sensitive information can easily be accessed by unauthorized people.
How to encrypt external hard drives? Generally speaking, there are 2 methods:
- Encryption of selected files and/or folders.
This is the ideal choice if you need to access files from many different computers or when sharing is required. Review step-by-step instructions. - Encryption of the entire removable drive.
This method is preferred when using a USB stick on the same few computers (i.e., home and office computers).
Encrypting selected files/folders can be convenient but has some risks. By encrypting a portion of the drive, chances are that a sensitive file could end up in the wrong location. For complete peace of mind, we’ll now show you 5 easy steps on how to encrypt the entire external hard drive on Windows 10 with BestCrypt Volume Encryption.
Skip here for instructions on how to encrypt external hard drives on Mac.
How to Encrypt External Hard Drives on Windows 10
Step 1: Run the Software as Administrator
If you didn’t install the software yet, do it now. Once BestCrypt is installed, ‘Run as administrator’…
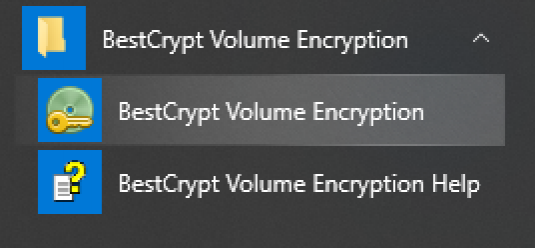
- Go to Start menu
- Select ‘BestCrypt Volume Encryption’
- Click the ‘BestCrypt Volume Encryption’ program appearing underneath
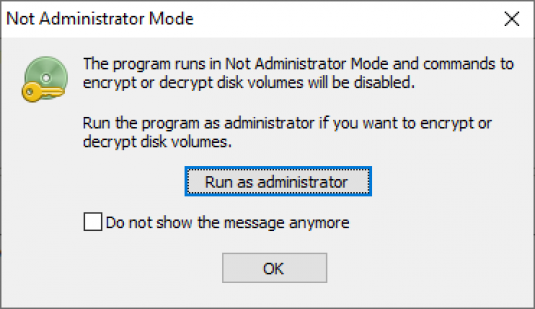
- A pop-up window will ask if you want to run BestCrypt as administrator, click ‘Run as administrator’
- If prompted for elevation, click ‘Yes’
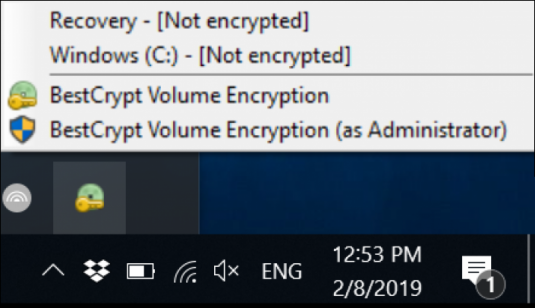
BestCrypt also resides in the system tray (bottom right corner).
- Click the BestCrypt icon
- Select ‘BestCrypt Volume Encryption (as Administrator)’
Step 2: Removable Drive Selection
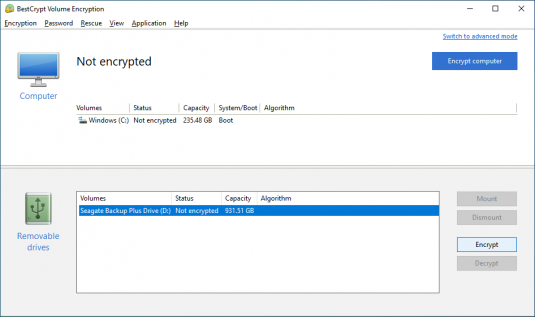
To get working quickly, version 4 of BestCrypt Volume Encryption introduced the ‘Simple Interface’ to activate encryption in only a few clicks. When you install BestCrypt, you can select ‘Simple Interface’ as the default mode. If the program ever opens in ‘Advanced Mode’, click the ‘Application’ tab and select ‘Switch to simple mode’.
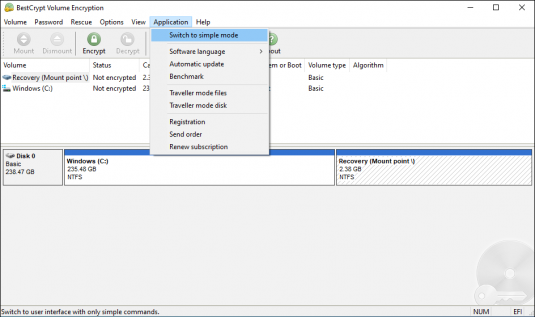
- Plug in the removable drive you want to encrypt
- Select your removable drive shown in BestCrypt
- Click ‘Encrypt’
Step 3: Create Encryption Password
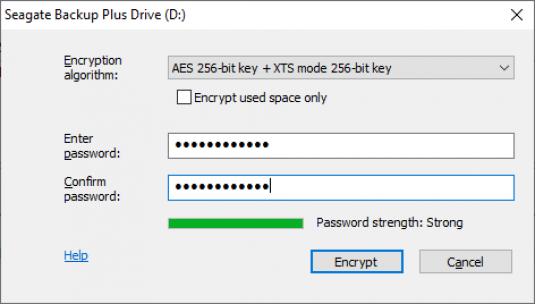
It’s time to create a password for your external hard drive. Every time you access your encrypted volume, this password will be requested. Be sure you don’t forget it! What makes a strong and memorable password? We offer tips here.
- Select an encryption algorithm from the dropdown menu – by default BestCrypt uses AES
- Choose and enter a password (min 8 characters) – as you are entering your password, BestCrypt will indicate its strength
- Confirm your password
- Click ‘Encrypt’
Step 4: Encryption Process
Now you can sit back and enjoy the show!
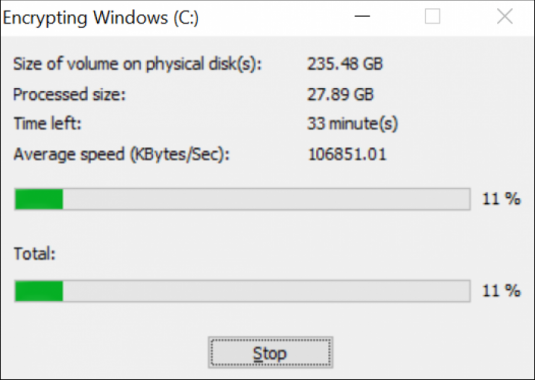
Once the encryption process begins, you will see a progress status window showing remaining time and percent completed. At any time, you can click ‘Stop’ and continue again later.
When completed, you will see a prompt informing, ‘The encryption process has finished successfully.’
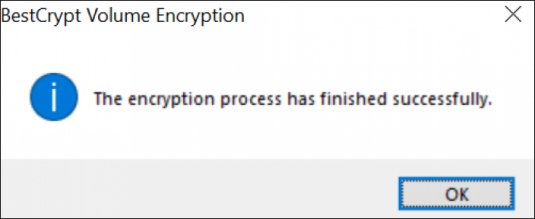
If you see anything other than the success message, please contact Jetico Technical Support.
Step 5: Rescue Disk Creation
Upon completion of the encryption process (or if stopped in the middle), you will be prompted to create either a Rescue USB or ISO (for CD). Do not skip this important step!
- You are strongly advised to always go through the Rescue Disk preparation process and to update it every time you are prompted.
- You really need and want a Rescue Disk. In the event of a computer malfunction, this will rescue you and your data!
Here is a step-by-step guide on how to prepare a rescue disk.
How to Encrypt External Hard Drives on Mac
Step 1: Launch the Application
If you didn’t install the software yet, download BestCrypt now for free. Once BestCrypt is installed…
- Click the ‘Launchpad’ icon from the toolbar

- Open ‘BestCrypt Volume Encryption’ by clicking the icon

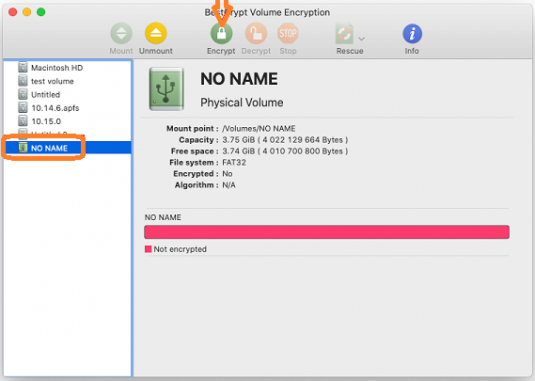
Step 2: Removable Drive Selection
- Plug in the removable drive you want to encrypt
- Select your removable drive shown in BestCrypt
- Click ‘Encrypt’
Step 3: Create Encryption Password
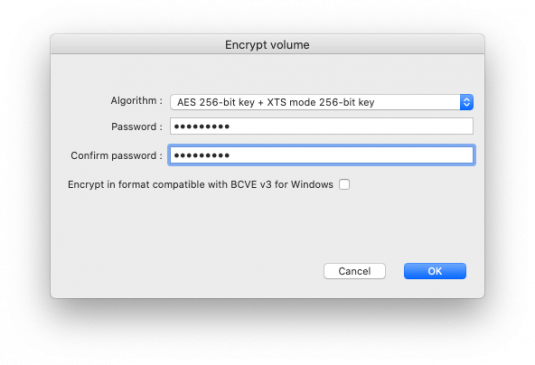
It’s time to create a password for your external hard drive. Every time you access your encrypted volume, this password will be requested. Be sure you don’t forget it! What makes a strong and memorable password? We offer tips here.
- Select an encryption algorithm from the dropdown menu – by default BestCrypt uses AES
- Choose and enter a password (min 8 characters)
- Confirm your password
- Click ‘OK’
Step 4: Encryption Process
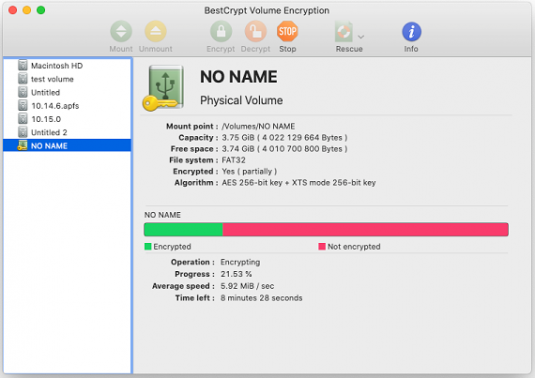
Now you can sit back and enjoy the show!
Once the encryption process begins, you will see a progress status window showing remaining time and percent completed. At any time, you can click ‘Stop’ and continue again later.
Step 5: Unmount Volume
Upon completion of the encryption process, before ejecting the external drive, it is recommended to unmount the volume by clicking ‘Unmount’.
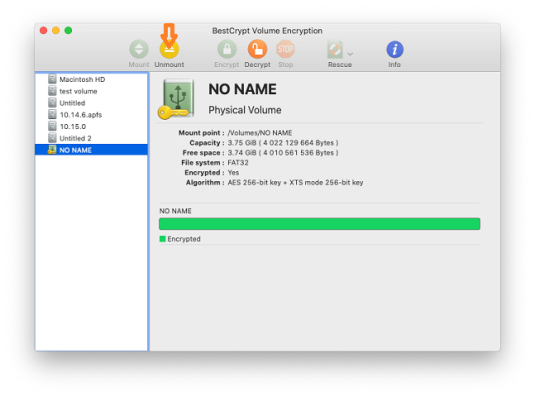
A soon as you unmount the volume, your encryption password will be required to access the data.
Happy Encrypting!
Related Articles
How to Encrypt Your Computer
How to Encrypt Files on Windows 10
How to Take Back Your Privacy in the Cloud with File Encryption Software
