Group page
The Group pages host controls for each individual group in the database.
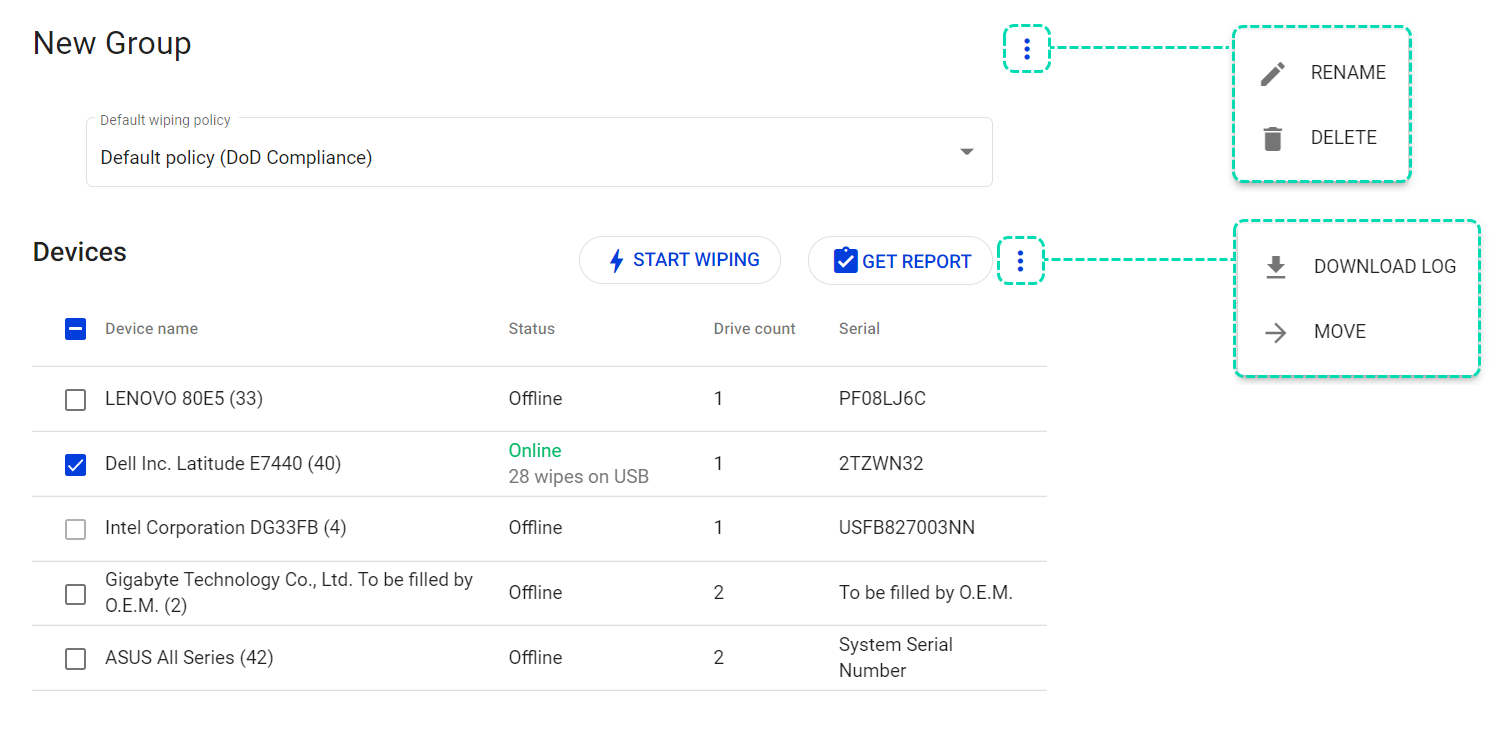
Select a group from the list of groups and devices in left panel of the management console to open the corresponding Group page. The following view appears:

Group controls
The group controls include the Rename and Delete commands for the Group as well as the group-wide controls such as the default wiping scheme and hardware diagnostics.
To change the name of the group, click on ellipsis icon, then select RENAME. After updating the name of the group, click Rename again to apply changes.
To delete the group, click on ellipsis icon, then select DELETE. At the confirmation message click Delete again to proceed.
NOTE: You can only delete a group when it's empty.
The Default Wiping Policy control enforces a wiping policy for all devices in this group. To change, select the preferred wiping policy from the drop-down menu.
Device controls
The device controls area hosts a list of all devices in the group together with their current status, the number of connected drives and serial number.
Select one or more devices from the list by setting the checkbox next to their names. (To select all devices in the group, set the upmost checkbox in the view). The following commands will become available:
🗲START WIPING (only for Online devices) - initiates the wiping process with the default wiping policy set for the group, erases all connected drives.
GET REPORT - downloads the erasure report with default settings defined in Report customization.
DOWNLOAD LOG - downloads the wiping log for the most recent wiping task.
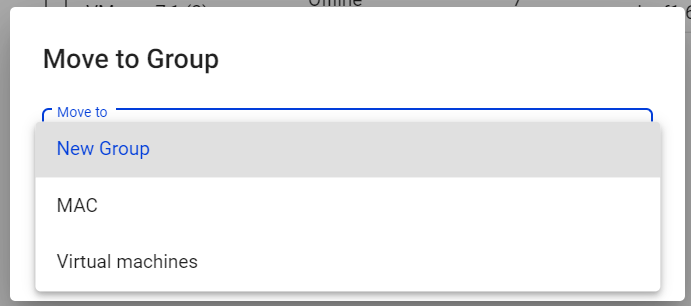
MOVE - enables moving computers between groups. To move, select a group from the drop-down list and confirm by clicking Move again.

To view details about specific device, click on the name of that device in the list. This will switch you to the Device page, where you can review the list of drives connected to the device and assign wiping tasks to them individually.