BCWipe Total WipeOut Configuration Wizard in Enterprise Server mode
BCWipe Total WipeOut Enterprise Server edition enables IT professionals to take wiping activities to another level with central management and remote wiping capabilities. BCWipe TotalWipeOut Configuration Wizard is a component responsible for creating and configuring bootable media (USB or CD/DVD) with the BCWipe Total Wipeout Wiping Utility.
In this article we will review the key steps of the BCWipe TotalWipeOut Configuration Wizard when used as part of the BCWipe Total WipeOut Enterprise Server solution.
Creating bootable USB
|
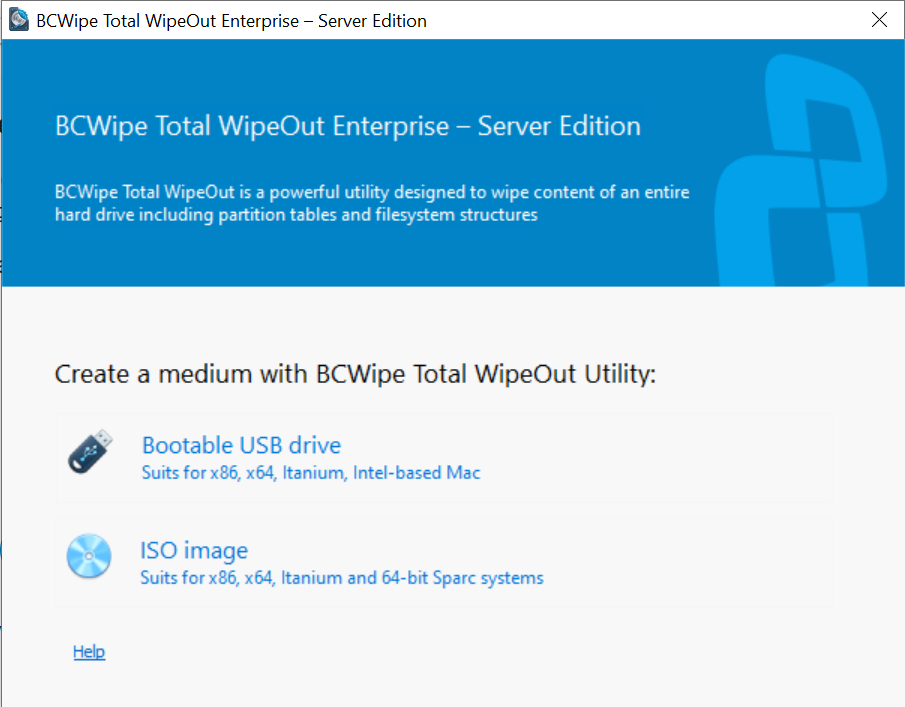
The start page of BCWipe Total WipeOut Configuration Wizard offers selection for bootable media drive type. 🗲HINT: Jetico recommends choosing the USB drive option. The CD/ISO option is only available in the Enterprise Edition for the devices with no USB ports available. To configure a bootable USB, plug in the USB drive you will be using with BCWipe Total WipeOut, then click Bootable USB drive and proceed to step 2a of this guide. To configure a bootable CD/ISO, click ISO image and proceed to step 2b of this guide. |
|
|
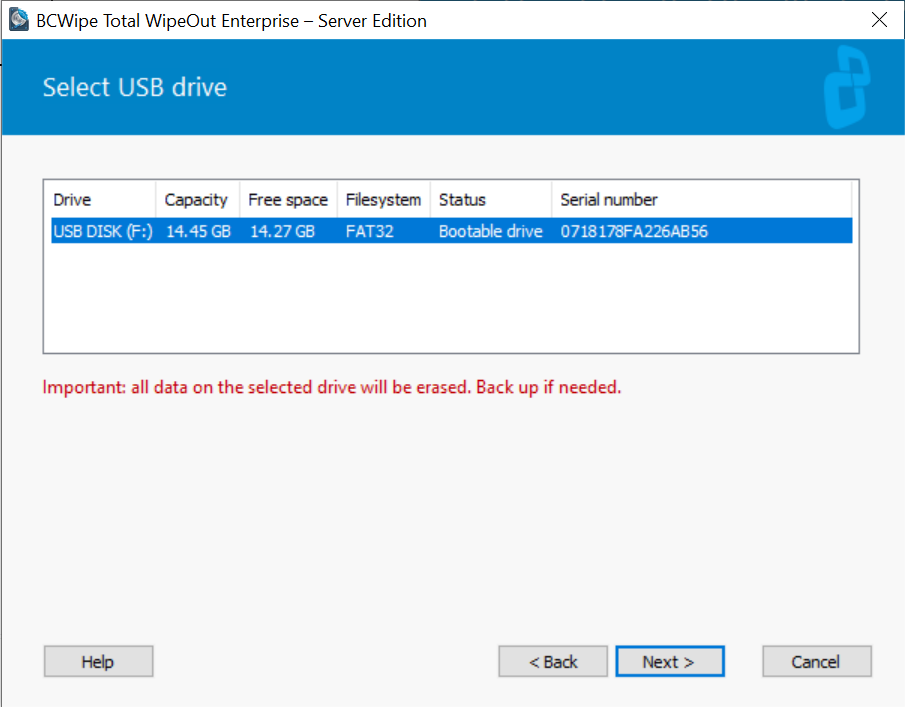
The window contains the list of all removable USB drives connected to the computer and detected by the Configuration Wizard. For each drive, the Wizard reports its' volume label and drive letter, capacity, available free space, file system, status and serial number. The status field may contain the following values:
WARNING: Format will erase all data off the USB drive. Save the important files elsewhere before using the drive for BCWipe Total WipeOut,
Select a drive to be configured as BCWipe Total WipeOut and click |
|
|
2b. Select location and file name for ISO image If you choose ISO image, the Wizard will prompt you to select where to save the .ISO to once ready. By default, BCWipe Total WipeOut saves the output .ISO files to your Documents folder. If you would like to change that destination, type in a path to the preferred folder manually, or click Once the ISO is ready, use a CD Burning software of your choice to burn the BCWipe Total WipeOut ISO image to CD disk. When ready with this step, click |
|
|
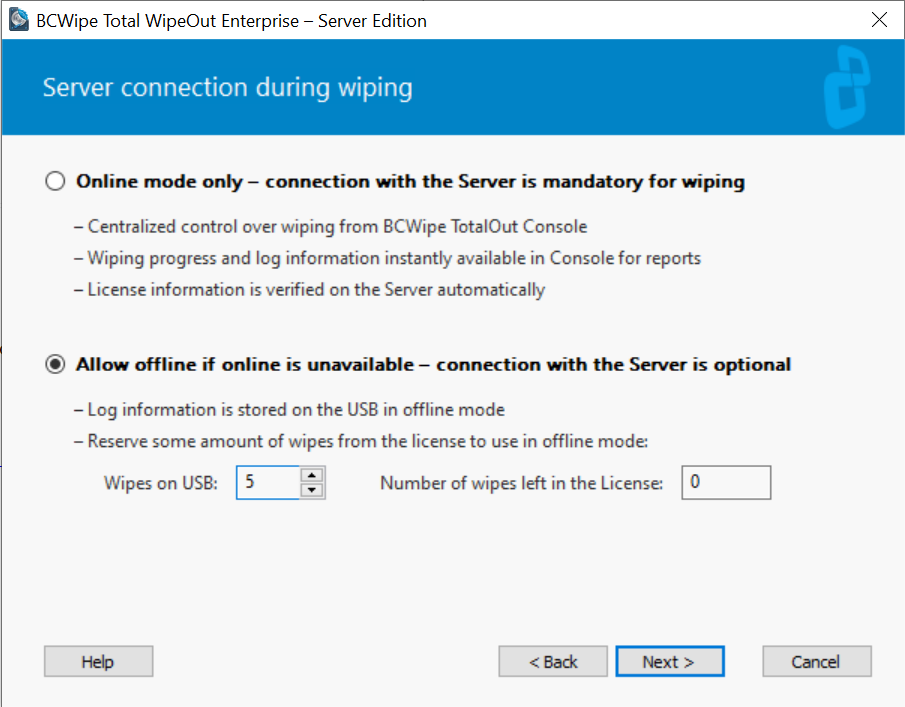
If the target device has wired connection to the local network, we recommend choosing the "Online mode only" option. This enables the capabilities of remote management. All the data associated with the wiping task including the license count will be sent to the web console in real time If it's unclear whether the target device has wired connection or not, choose "Allow offline if online is unavailable". This option allows for greater flexibility. If the device does have connection to the server, you can still enjoy the remote management capabilities. Otherwise, the wiping process shall be controlled locally at the endpoint. NOTE: Bootable CD / ISO can only operate with the "Online mode only" setting To enable wiping in offline mode, pre-load some wipes to the USB. To do so, adjust the amount in the "Wipes on USB" edit box to match the expected number of drives to be wiped offline. NOTE: If BCWipe Total WipeOut Server IP is not accessible from the computer you're running the configuration wizard on, the USB can only be created for "Online mode only" Click |
|
|
When in Automatic mode, BCWipe Total WipeOut will erase all drives connected to the target endpoint after a 1 minute countdown. When in Manual mode, a user selects drives to be wiped and initiates the wiping process manually. |
|
|
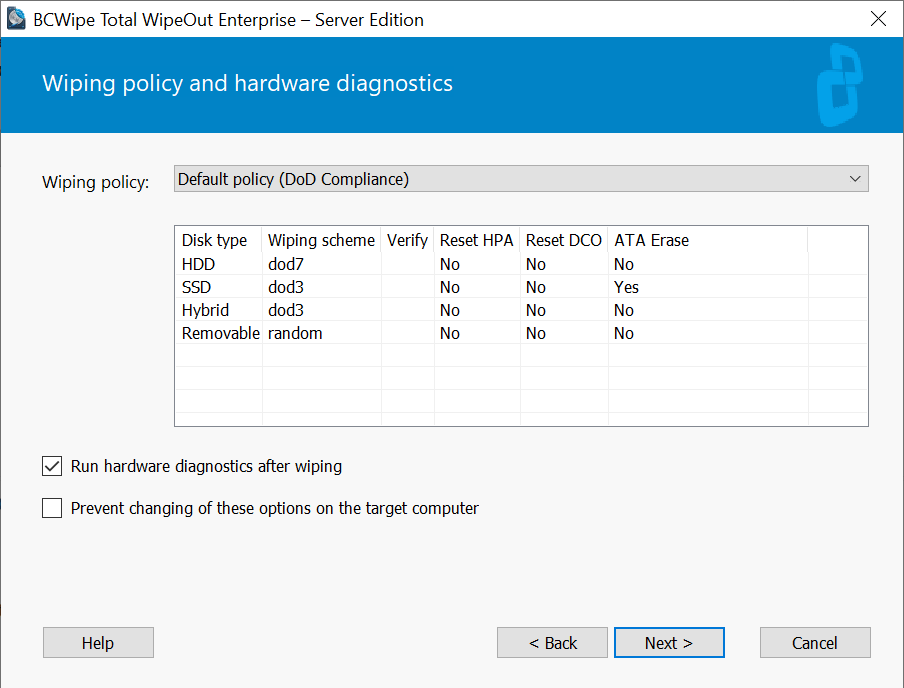
The Wiping policy drop-down menu loads the list of wiping policies created in the web console. The Default policy features the wiping settings carefully selected by Jetico engineers to ensure the most effective results with minimal lifetime impact on each of the the drive types. In this tutorial we will choose the Default Policy. Learn how to create a custom wiping policy here: Policy Management With the demo license all wiping schemes are reset to the 1-pass-zero scheme. Purchase a full license to unlock the jetico-recommended schemes in Default policy. Enable Run Hardware Diagnostic after wiping for BCWipe Total WipeOut to perform an additional set of health checks for devices in this group immediately after wiping. To see the results of those tests in the wiping report, make sure the corresponding checkbox is set in Report customization. Wnen the ☑Prevent wiping settings from being changed on the target computer checkbox is set, the Main menu will be disabled in BCWipe Total WipeOut wiping utility UI on the target device, making sure the wiping settings selected in the Wizard cannot be tampered with. |
|
|
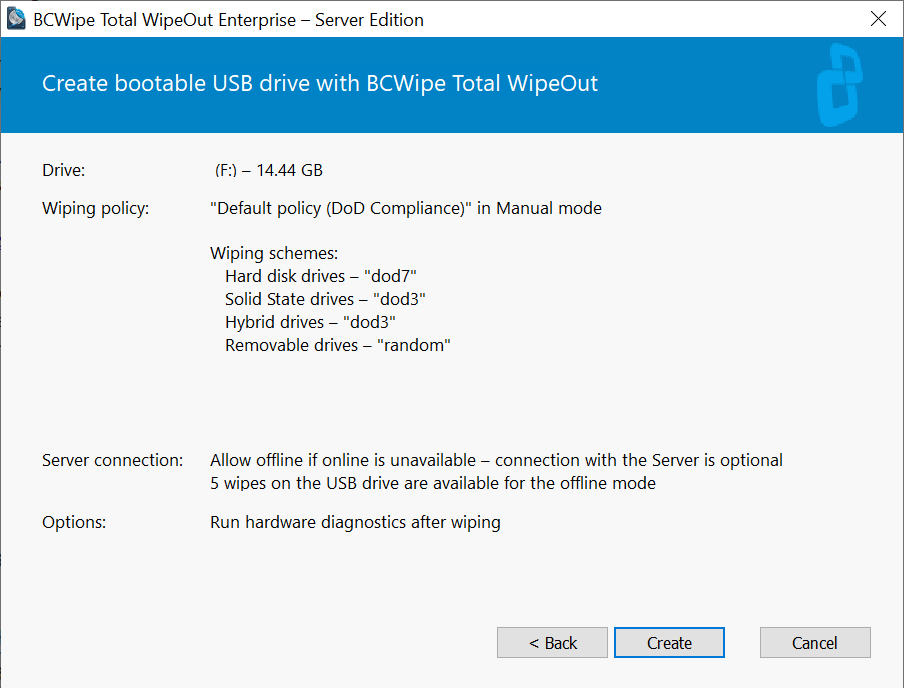
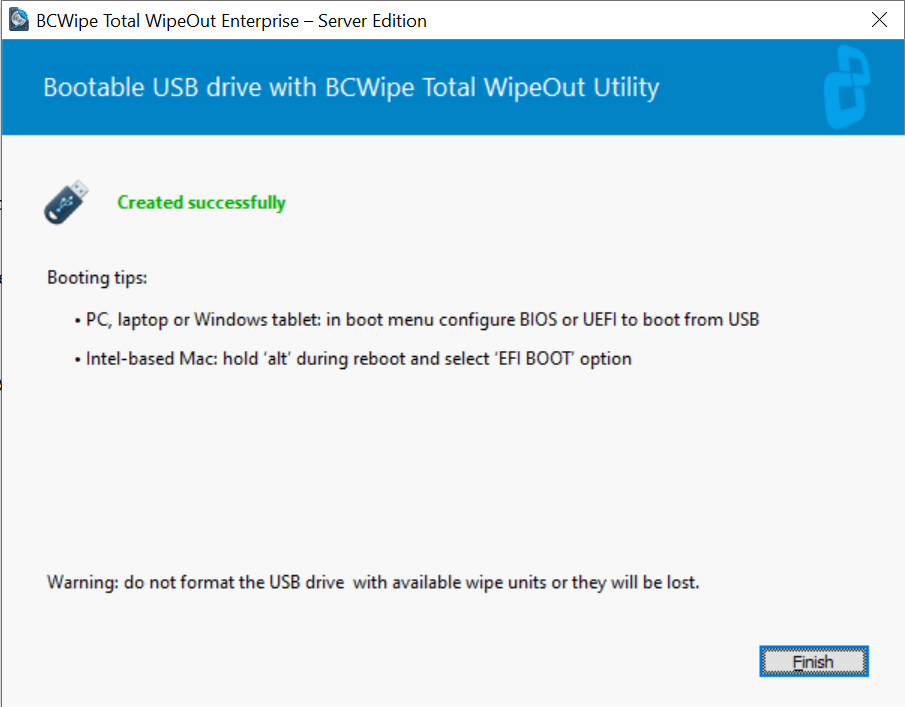
6. Finish creating the USB/CD Review the selected settings at the Overview page of the Configuration Wizard, then click Once the bootable medium of choice is ready, you will see a confirmation window. Click Finish. |
|
|
7. Boot target device with BCWipe Total WipeOut 🗲HINT: Load into BIOS and change the boot sequence, so that USB/CD boots first (otherwise force boot -> USB/CD). Save new settings and leave BIOS. Plug the USB/CD in, power the device on and select the USB/CD from the list of boot options. The process is described in more detail in this article: Booting target device with BCWipe Total Wipeout 🗲HINT: If you wish to manage wiping remotely from the web console, make sure target device has wired connection to the network where BCWipe Total WipeOut Server is running. |
|
